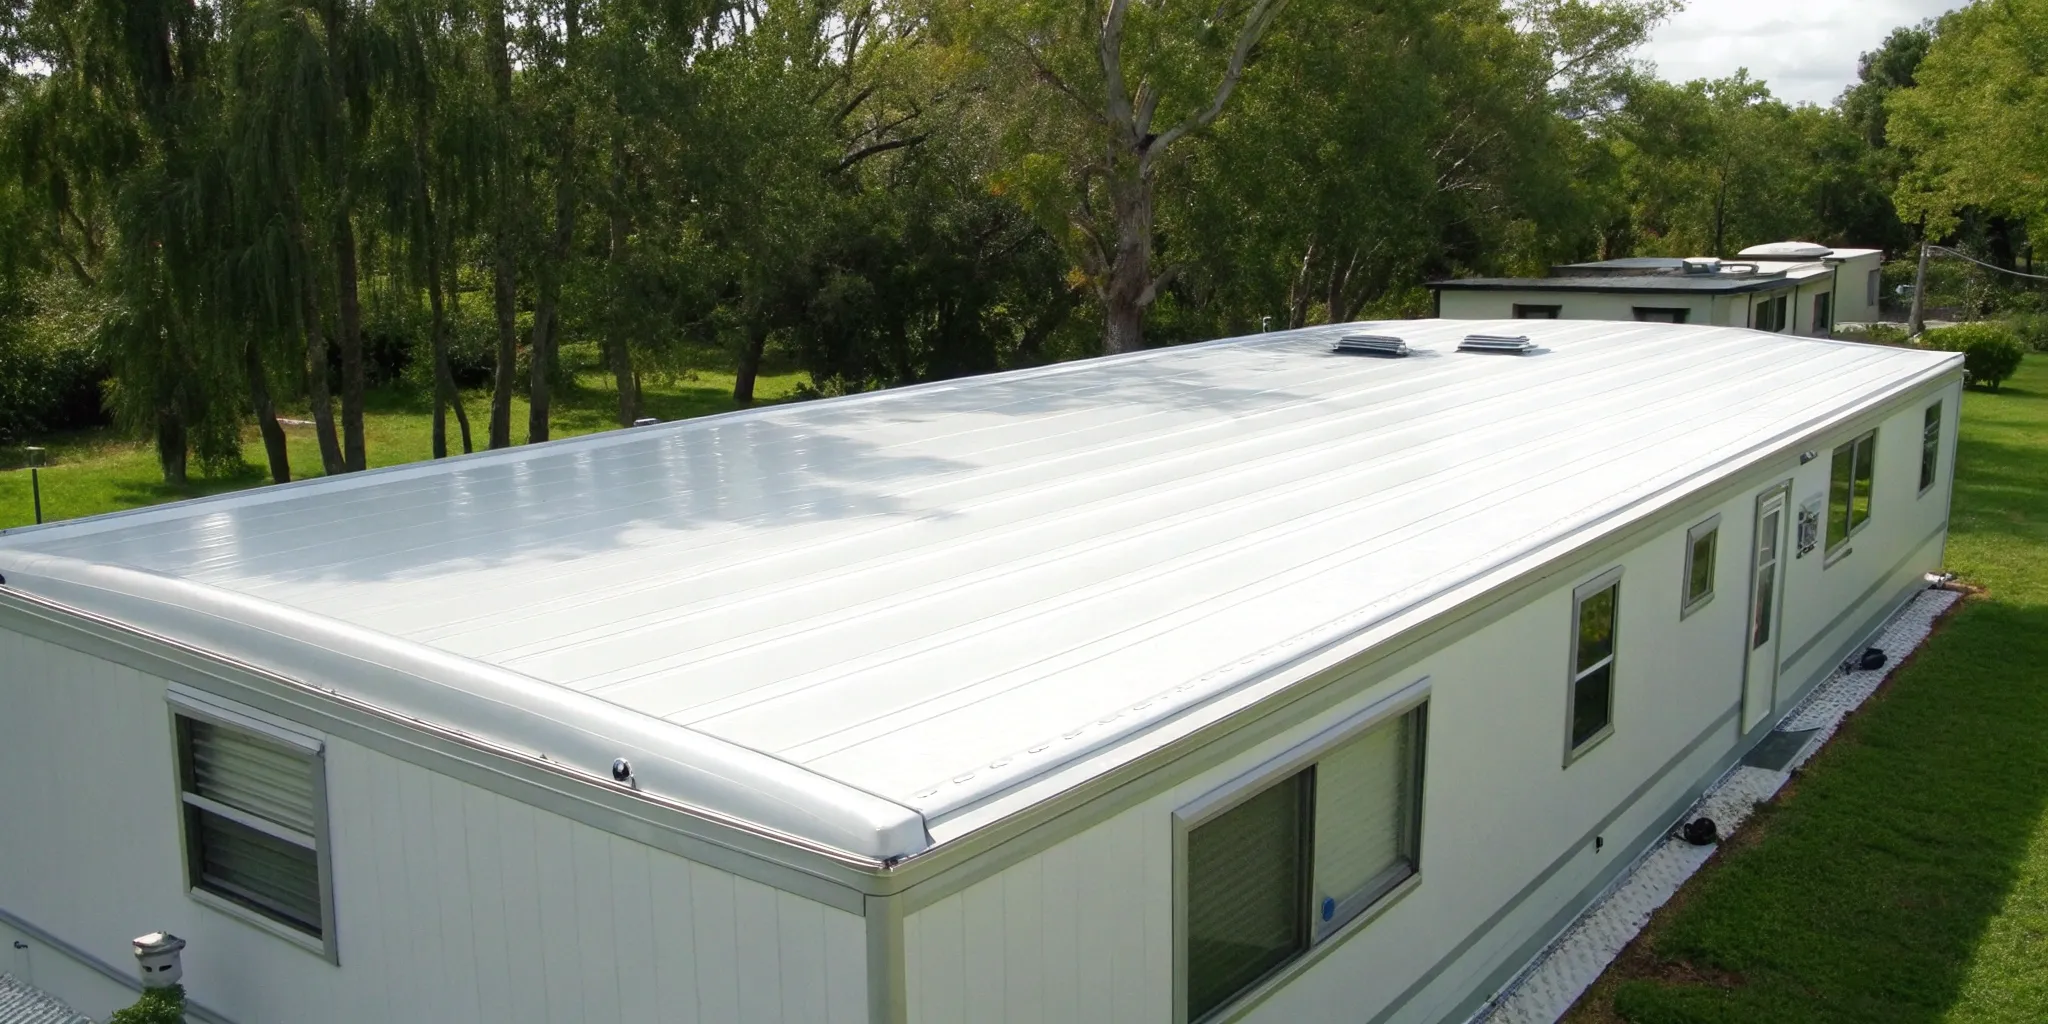
You’ve probably heard about TPO roofing, especially for commercial buildings, but its benefits make it an outstanding choice for residential properties, too—particularly mobile homes. Its lightweight nature doesn’t stress the structure, while its white, reflective surface is a game-changer for keeping your home cool in the Florida heat. It’s a tough, seamless barrier against our notorious rainstorms. But knowing why it’s a great choice is only half the battle. The other half is understanding the installation process. This guide provides a step-by-step look at how to install TPO roofing on a mobile home, giving you the knowledge needed to tackle the project with confidence.
Key Takeaways
- Choose TPO for savings and storm defense: TPO roofing is a smart choice for Florida homes because its reflective surface cuts cooling costs, while its heat-welded seams create a durable, waterproof shield against heavy rain and high winds.
- A successful installation is all in the details: A lasting TPO roof requires a clean, well-prepared surface and perfectly heat-welded seams. Rushing the prep work or creating weak seams are the most common points of failure that lead to leaks.
- Proactive care extends your roof’s life: Keep your TPO roof performing for decades with simple, twice-yearly inspections. Gently clean the surface to maintain its energy efficiency and call a professional for repairs to prevent small issues from becoming major problems.
Why TPO Roofing is a Smart Choice for Your Mobile Home
Choosing the right roofing material for your mobile home is a big deal, especially here in Central Florida where the sun and storms don’t mess around. You need something that’s tough, energy-efficient, and won’t break the bank. That’s where TPO roofing comes in. It’s a modern solution that has become a go-to for its impressive performance and value.
TPO offers a powerful combination of durability and energy savings that is perfectly suited for mobile homes. It’s a lightweight material, which is a huge plus, but it’s also incredibly strong and resistant to the challenges of our climate. From reflecting the intense summer sun to standing strong against high winds, TPO provides peace of mind and practical benefits. Let’s look at what makes it such a smart investment for your home.
The Basics: What TPO Is and Its Key Benefits
So, what exactly is TPO? The name stands for Thermoplastic Olefin, a single-ply roofing membrane made from a blend of rubber and polymers. Think of it as a high-tech, durable sheet that covers your entire roof. This material is a popular choice for commercial roofing because it’s so reliable, and those same benefits make it ideal for mobile homes. It’s flexible, resistant to punctures and tears, and stands up well against UV rays. Its lightweight nature also means it won’t add unnecessary stress to your home’s structure.
How TPO Can Lower Your Energy Bills
One of the biggest perks of TPO roofing in Florida is its energy efficiency. Most TPO membranes are white and highly reflective, acting like a giant shield against the sun. This “cool roof” technology can bounce away up to 87% of the sun’s heat, keeping it from being absorbed into your home. What does that mean for you? A cooler house and a less overworked air conditioner. Homeowners can see their cooling costs drop by 20-30%, which adds up to significant savings on your monthly energy bills. It’s a smart way to make your home more comfortable.
Built to Last: Durability and Weather Resistance
Your roof is your home’s first line of defense, and TPO is built for the job. This material is engineered to be tough, resisting mold growth, dirt, and impact damage. For those of us in Central Florida, its performance during storm season is what really matters. A professionally installed TPO roof can withstand hurricane-force winds up to 130 mph. The seams are heat-welded together to create a single, seamless membrane that’s incredibly effective at preventing leaks. With warranties that can last up to 30 years, you can be confident your investment is well-protected.
Getting Started: Your TPO Installation Toolkit
Okay, you’re sold on the benefits of TPO roofing and ready to get to work. Before you climb that ladder, let’s talk about what you’ll need to do the job right. A successful installation starts with having the correct materials, the proper tools, and a solid safety plan. Gathering everything you need beforehand will make the entire process smoother and help you avoid any mid-project hiccups. Think of this as your pre-flight checklist for a durable, long-lasting roof that will protect your home for years. Let’s get you set up for success.
Choosing the Right TPO Materials
The first step is selecting high-quality TPO roofing materials. You want a membrane that meets industry standards for durability and can stand up to Florida’s intense sun and storms. TPO membranes come in different thicknesses—typically 45, 60, or 80 mil—with thicker options offering greater puncture resistance. For most residential roofing projects, a 60-mil membrane is a great choice. Always follow the manufacturer’s instructions for your specific product, as this will guide your installation. Beyond the membrane itself, you’ll also need insulation boards, the correct adhesive or fasteners, seam tape, and flashing for vents and edges. Getting these components right is key to creating that seamless, leak-proof surface TPO is known for.
The Essential Tools for the Job
Having the right tools is just as important as having the right materials. For a TPO installation, some specialized equipment is non-negotiable. The most critical tool is a hot-air welder, which you’ll use to fuse the seams together for a watertight bond. You’ll also need a sharp utility knife for cutting the membrane to size and a silicone roller to press the seams firmly after welding. Other must-haves include a measuring tape, a chalk line for straight cuts, a power drill for fasteners, and a caulk gun for sealants. Don’t forget a seam probe—a small, hooked tool—to check the quality of your welds. Meticulous flashing installation is crucial, so having the right tools for that step will save you from future leaks.
Safety First: Your Must-Have Gear
Working on any roof comes with risks, so let’s make safety your top priority. Before you start, make sure you have the essential personal protective equipment (PPE). This includes sturdy, non-slip work boots, protective eyewear, and a good pair of gloves. While mobile home roofs are typically low-slope, a safety harness is always a smart idea. Always read the manufacturer’s instructions for your materials and tools, and keep a close eye on the weather—a sudden rainstorm can make surfaces dangerously slick. If you ever feel unsure or encounter unexpected damage, don’t hesitate to pause. Sometimes the safest decision is to call in a professional, especially for an emergency roof repair to secure your home properly.
Your Step-by-Step TPO Installation Guide
Installing a TPO roof is a detailed process, but breaking it down into manageable steps makes it much clearer. Think of this as your roadmap from start to finish. While many homeowners with the right experience can tackle this project, remember that a flawless installation is key to a long-lasting, leak-free roof. If you ever feel out of your depth, our team of residential roofing experts is always here to help ensure the job is done right, protecting your home and your investment for years to come.
Step 1: Prepare the Roof Surface
Before you can lay down any new material, you need a clean slate. A properly prepared surface is the foundation of a successful TPO installation. Start by thoroughly cleaning the existing roof, removing all dirt, debris, and loose materials. Once it’s clean, give it a detailed inspection. Look for any signs of damage, like soft spots, cracks, or moisture. If you find significant issues, especially after a recent storm, it might be wise to get a professional hail damage inspection to assess the underlying structure. Addressing these problems now prevents bigger headaches later and ensures your new TPO membrane has a solid, stable base to adhere to.
Step 2: Install Insulation and a Vapor Barrier
With a clean surface ready, the next layer is insulation. For TPO systems, high-density polyisocyanurate, or “ISO board,” is the standard. This isn’t just for warmth; it provides a smooth, flat surface for the TPO membrane and adds a significant boost to your home’s energy efficiency. You’ll want to lay down the proper thickness of ISO board, securing it firmly to the roof deck according to the manufacturer’s instructions. In many cases, a vapor barrier is also installed beneath the insulation. This crucial layer prevents moisture from inside your home from rising and getting trapped, which could lead to condensation and damage over time.
Step 3: Roll Out and Position the TPO Membrane
Now for the main event: the TPO membrane itself. This step requires a bit of patience. After getting the large roll onto the roof, carefully roll out the TPO membrane over the insulation. Let it sit and relax for about 30 minutes. This allows any wrinkles or creases from being rolled up to flatten out, which is essential for a smooth finish and strong seams. Make sure you position the sheet correctly, allowing for enough overhang on all sides of the roof. This extra material will be trimmed later, but it’s crucial for ensuring complete coverage and proper flashing at the edges.
Step 4: Secure the Membrane
Once the membrane has relaxed, it’s time to attach it to the roof. There are a few ways to do this, but the most common methods for a mobile home are mechanical fastening or using a strong adhesive. With mechanical fastening, special plates and screws are driven through the membrane and into the roof deck along the edge of the sheet. For a fully adhered system, a powerful bonding adhesive is spread onto the insulation, and the TPO membrane is carefully rolled into it. The goal of either method is to create a secure, uniform attachment that will hold up against strong winds and weather.
Step 5: Heat Weld the Seams for a Watertight Seal
This is where the magic happens. The process of heat welding is what turns multiple sheets of TPO into a single, seamless, waterproof surface. Using a hot-air welder, you’ll heat the overlapping edges of the TPO sheets until they reach a molten state. Then, you use a silicone roller to press the seams together, fusing them into a permanent, watertight bond. This step requires skill and a steady hand—too much heat can burn the material, while too little results in a weak seal. A properly welded seam is actually stronger than the membrane itself, creating a truly monolithic barrier against leaks.
Step 6: Add Flashing Around Edges and Vents
A roof is more than just a flat surface; it has pipes, vents, and edges that can be vulnerable to water intrusion. Flashing is the solution. This involves using special, non-reinforced TPO material to custom-fit and seal around every penetration and along the entire perimeter of the roof. Each piece of flashing is meticulously cut, positioned, and heat-welded to both the membrane and the object it’s sealing. This detailed work ensures that the most complex areas of your roof are just as waterproof as the main field, leaving no entry points for rain or moisture.
Step 7: Perform a Final Quality Check
After all the hard work is done, it’s time for one last, critical step: a thorough inspection. Don’t be tempted to skip this. Go over every inch of your new roof, paying close attention to the details. Use a seam probe—a small, hooked tool—to gently check the entire length of every welded seam for any potential gaps or weak spots. Examine all the flashing around vents and edges to ensure it’s completely sealed. Look for any accidental punctures or loose areas. Catching a small issue now is far easier than dealing with a leak later. This final check gives you the peace of mind that your roof is ready for anything.
Common Mistakes to Avoid (And How to Stay Safe)
Installing a TPO roof can be a rewarding project, but even the best materials won’t perform well if they aren’t installed correctly. A small mistake during installation can lead to big problems like leaks, poor insulation, and a shortened lifespan for your roof. It’s not just about getting the steps right; it’s about avoiding the common pitfalls that can turn a straightforward job into a costly repair.
Beyond the quality of the installation, your safety is the top priority. Working on any roof comes with risks, and it’s easy to overlook simple precautions when you’re focused on the task at hand. From preparing the surface to watching the weather, taking a careful and methodical approach is key. Let’s walk through some of the most frequent mistakes people make during a TPO installation and, more importantly, how you can steer clear of them to ensure a safe and successful project.
Prioritizing Safety During Installation
It’s easy to get caught up in the project and forget the most important rule: safety first. Before you even step onto the roof, take the time to carefully read the TPO manufacturer’s instructions. These guides contain specific safety protocols you need to follow. Always wear the right gear, including non-slip boots, gloves, and safety glasses. Make sure your ladder is secure and that you’re aware of your surroundings at all times. Rushing through the job isn’t worth the risk of an accident, which could lead to serious injury and the need for emergency roof repair. A safe installation is a successful one.
Don’t Skip the Prep Work
A new TPO roof is only as good as the surface it’s installed on. One of the biggest mistakes is failing to properly prepare the existing roof. Before you lay down any new material, you need to thoroughly inspect the entire surface for damage like punctures, tears, or soft spots. Any issues must be repaired first. The substrate needs to be clean, dry, and completely smooth. Debris, dirt, or moisture left underneath the TPO membrane will prevent it from adhering correctly and can cause major problems down the road. Proper prep work is a non-negotiable step for any quality residential roofing project.
Perfecting Your Seam Welds
The seams are where a TPO roof is most vulnerable to leaks, which makes welding them correctly absolutely critical. The goal is to use a hot-air welder to fuse the overlapping TPO panels, creating a single, seamless membrane that is completely watertight. This requires the right temperature, speed, and pressure. If the welder is too hot, it can burn the material; too cool, and the seams won’t bond properly. Practice on some scrap pieces first to get a feel for the equipment. Weak seams can easily be compromised by severe weather, turning a small issue into significant hail damage.
Why You Should Always Check the Forecast
This might sound obvious, but you’d be surprised how often the weather is ignored. TPO installation is not an all-weather job. Rain is a definite no-go, as moisture will get trapped under the membrane and ruin the adhesion. High winds can make handling large sheets of TPO material incredibly dangerous and difficult. Even temperature matters—most adhesives and sealants have specific temperature ranges for proper application. Always check the forecast for a clear, calm, and dry window of time to complete your project. Planning around the weather is a standard practice for any professional commercial roofing job, and it should be for yours, too.
Maintaining Your New TPO Roof for Years to Come
Once your TPO roof is installed, a little routine care will go a long way in protecting your investment and keeping your mobile home safe and dry. Think of it like any other part of your home—regular check-ins can prevent small issues from becoming major headaches. The great news is that TPO is incredibly low-maintenance, but staying proactive is the key to getting the most out of its long lifespan. By following a simple maintenance plan, you can ensure your roof performs at its best for decades.
Your Simple Inspection Checklist
Set aside time twice a year, maybe in the spring and fall, to give your roof a quick look. After a major storm, it’s also a good idea to perform a check. You don’t need to be a roofing expert to spot potential trouble. Simply walk the surface of your roof (if you can do so safely) and look for the basics. Carefully examine the entire roof for any signs of damage, like tears, punctures, or wrinkles in the membrane. Pay close attention to the seams, making sure they are still flat and fully sealed. Also, check around vents, pipes, and skylights to ensure the flashing is secure. Catching these things early is the best way to keep your roof in top shape.
Keeping It Clean: Safe Cleaning Tips
One of the best features of a white TPO roof is its ability to reflect sunlight and keep your home cooler. To maintain this energy efficiency, it’s important to keep the surface clean from dirt, leaves, and other debris. You can clean a TPO roof with a soft-bristled broom and a gentle cleaning solution, like a mixture of mild soap and water. Avoid using harsh chemicals, pressure washers, or abrasive tools like steel wool, as these can easily damage the membrane. A gentle scrub is all it takes to remove buildup and restore your roof’s bright, reflective surface. Always prioritize safety when you’re on the roof by wearing slip-resistant shoes.
How to Handle Minor Repairs
During your inspections, you might spot a small puncture from a fallen branch or a piece of loose flashing. Your first instinct might be to fix it yourself, but it’s important to proceed with caution. If you see any damage or leaks, it’s crucial to get them repaired right away to prevent bigger, more expensive issues from developing. While DIY patch kits are available, an improper repair can void your warranty or even trap moisture, leading to more significant problems. For anything beyond sweeping off debris, your best bet is to document the issue with photos and contact a professional for a reliable fix.
When It’s Time to Call a Professional
While your own inspections are valuable, having a certified professional look at your roof annually is a smart move. A professional can spot subtle signs of wear and tear that you might miss and can perform maintenance that ensures your warranty remains valid. They can also confirm your roof has proper drainage, which is essential for preventing ponding water that can degrade the TPO membrane over time. If you notice persistent leaks, extensive damage after a storm, or large areas where seams are pulling apart, don’t hesitate. Calling in an expert ensures the job is done right, protecting your home and giving you peace of mind.
Related Articles
- TPO Roofing Details: A Complete Breakdown
- TPO Roofing Installation Cost: A 2025 Guide
- Top 7 TPO Roofing Manufacturers: A 2025 Review
- TPO Roofing Cost: A Complete Price Breakdown
Frequently Asked Questions
How long can I expect a TPO roof to last on my mobile home? With a professional installation and some basic annual maintenance, a TPO roof can easily last between 20 and 30 years. Its durability comes from the heat-welded seams that create a single, unified membrane, and its resistance to UV rays helps it stand up to the intense Florida sun without becoming brittle.
Can I install a new TPO roof directly over my old mobile home roof? While it might seem like a time-saver, it’s almost always better to remove the old roofing material first. Installing TPO over an existing roof can hide underlying problems like soft spots or moisture damage in the roof deck. A clean, properly prepared surface is the most important factor for ensuring your new TPO roof adheres correctly and lasts as long as it should.
Is TPO roofing noisy during a heavy Florida rainstorm? This is a common concern, but you’ll be happy to know that TPO roofing is actually very quiet. Because it’s installed over a layer of rigid foam insulation board, the sound of rain is significantly muffled. It’s generally much quieter than a metal roof and provides a solid, sound-dampening barrier.
Are there other color options besides white for TPO roofing? Yes, TPO membranes are available in other colors, most commonly gray and tan. However, for homes in Central Florida, white is by far the most practical and popular choice. Its high reflectivity is what makes it a “cool roof,” bouncing the sun’s heat away from your home and leading to significant savings on your cooling costs.
How does TPO compare to other common mobile home roofing materials? TPO offers a unique combination of benefits that make it ideal for mobile homes. Unlike metal roofing, it creates a seamless surface without thousands of screw holes that can become potential leak points. Compared to traditional shingles, which aren’t designed for the low-slope roofs on many mobile homes, TPO provides superior, long-term protection against water intrusion.