

That unmistakable drip… drip… drip is a sound no homeowner wants to hear. Finding a leak in your roof can send you into a panic, especially when a Central Florida storm is raging outside. Your first thought is to make it stop, and fast. While a permanent repair is a job for professionals, knowing how to apply a safe and effective temporary quick fix for a roof leak can save your home from serious water damage. This guide is your first-aid manual for a leaking roof. We’ll walk you through how to safely find the source, what you can do to manage the problem right now, and when to make the call for emergency help.
Key Takeaways
- Your Safety is Non-Negotiable: Before you do anything, assess the situation. Never get on a wet roof, always have a spotter on the ground, and recognize when a problem is too big or dangerous to handle yourself.
- Act Fast to Control the Damage: Immediately place buckets to catch drips and use fans to start drying the area inside. If it’s safe, apply a temporary fix like a tarp or sealant on the roof to prevent more water from entering your home.
- A DIY Patch is a Band-Aid, Not a Cure: Temporary fixes are designed to buy you time until a professional can find and fix the root cause. The best long-term strategy is a permanent repair followed by regular maintenance to prevent future leaks.
What Causes Roof Leaks?
Finding a puddle in your living room is a terrible way to start the day. Roof leaks can spring from a variety of issues, from obvious storm damage to subtle problems that develop over time. Pinpointing the source is the first step toward a fast, effective fix. Before you can stop the drip, you need to understand what’s causing it.
Identify Common Causes of Leaks
Most leaks trace back to a few common culprits. Broken or missing shingles are often the most obvious problem, creating a direct path for water to enter your home. Another frequent issue is damaged flashing—the thin metal strips that seal the joints around chimneys, vents, and skylights. If these strips crack or come loose, they leave a gap for water to seep in. Clogged gutters can also cause water to back up and slide under the roof’s edge. On older roofs, the protective underlayment can wear out, or the shingles themselves may simply be past their prime, making your entire residential roofing system vulnerable.
Spot the Warning Signs
Sometimes, a leak announces itself with a steady drip, but other times the signs are much more subtle. Catching them early can save you from major headaches like mold growth and structural damage. Inside your home, be on the lookout for water stains on ceilings or walls, peeling paint, damp spots, or a persistent musty smell. Don’t ignore these clues, as they often point to a hidden problem. If you can safely do so, check your attic for damp insulation or wet wood. Even small signs of moisture are a clear signal that your roof needs attention and possibly an emergency roof repair.
Understand Weather-Related Damage
Here in Central Florida, our roofs are constantly put to the test. Intense sun and UV rays can bake shingles over time, making them brittle and prone to cracking. Then there are the storms. Heavy rain can exploit even the tiniest weakness, while strong winds can lift and tear off shingles, leaving your roof exposed. Hail is another major threat, as it can dent flashing and crack shingles on impact. If you suspect a recent storm has taken a toll on your roof, it’s wise to get a professional hail damage inspection. Weather can quickly turn a small issue into a significant leak.
Your Safety Checklist Before You Start
Before you even think about climbing a ladder, let’s talk about safety. A leaking roof is stressful, but an injury is far worse. Taking a few minutes to prepare can make all the difference between a successful temporary patch and a trip to the emergency room. Your well-being is the top priority, so running through this quick checklist is a non-negotiable first step. It’s about working smart and staying safe while you protect your home from further water damage.
Gather the Right Safety Gear
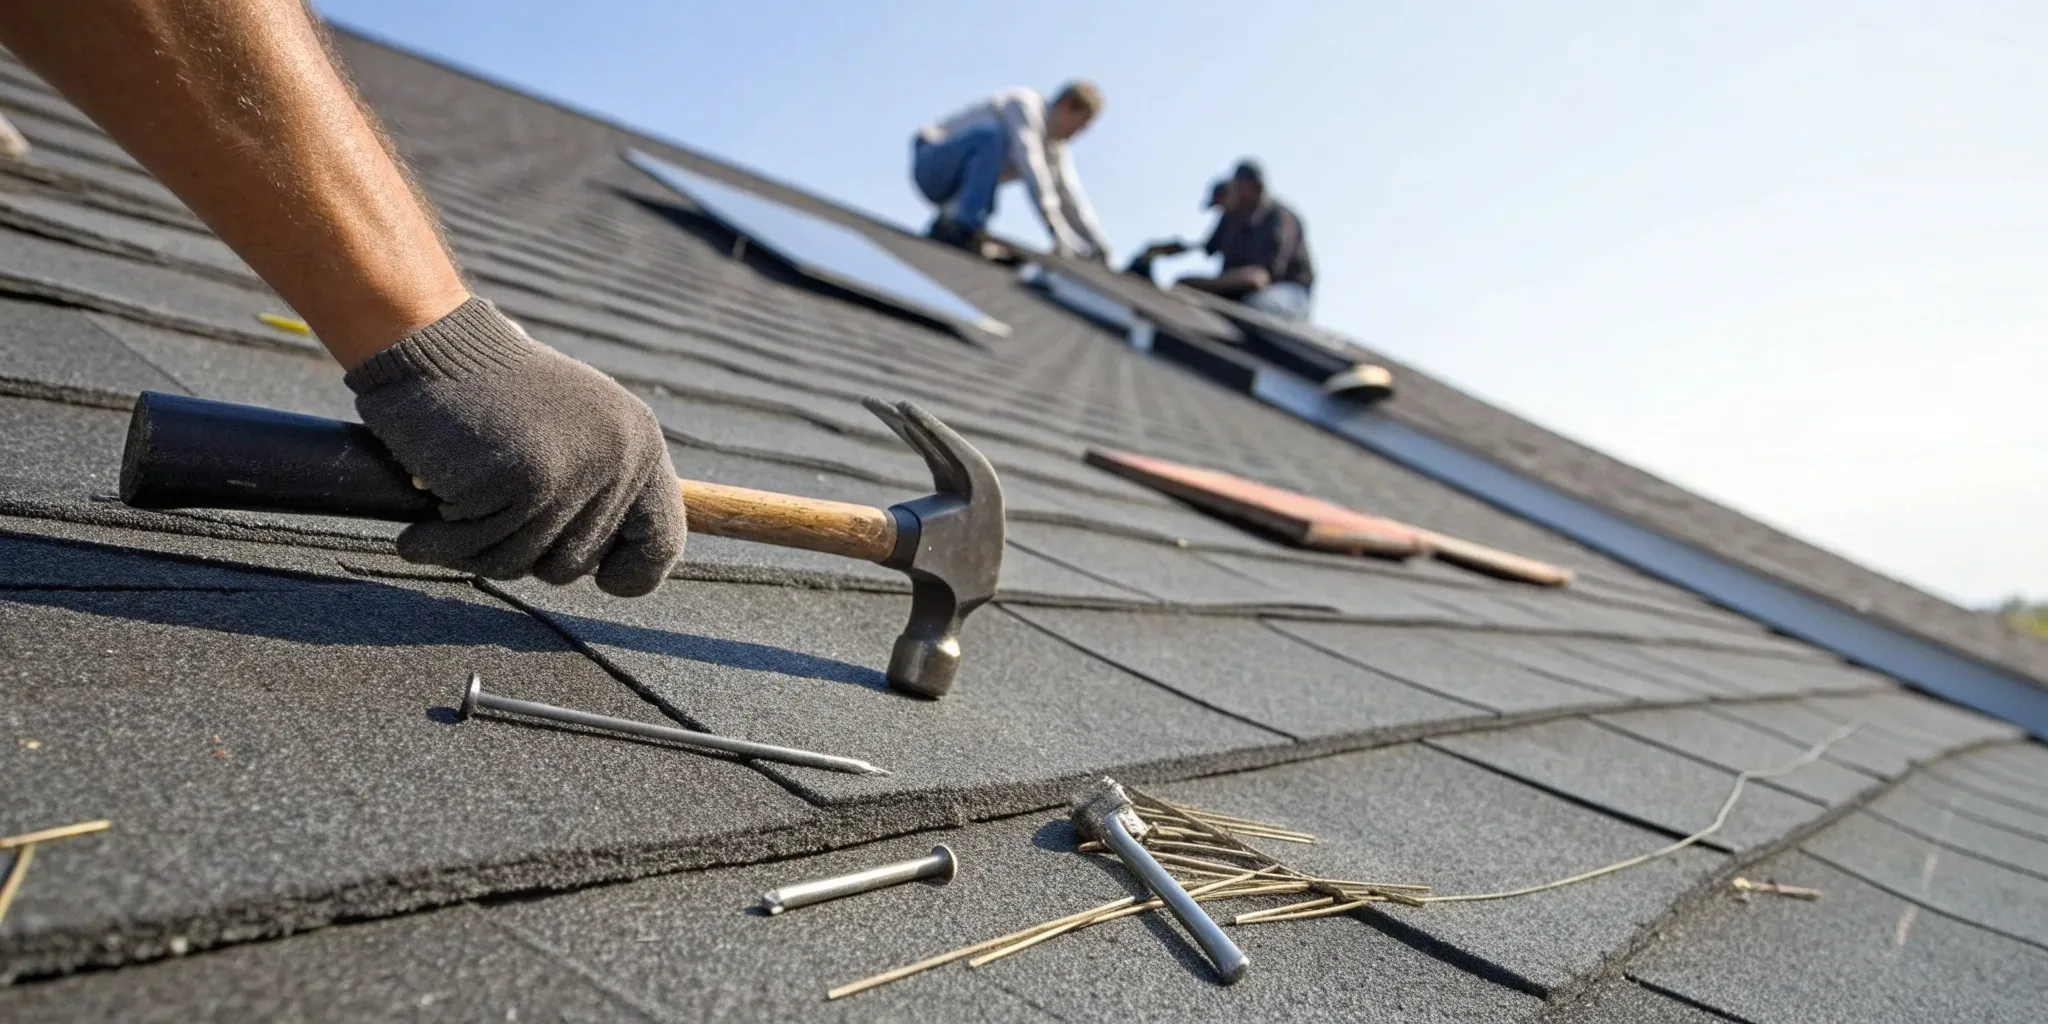
Having a “roof first-aid kit” ready to go can save you precious time when you spot a leak. You don’t want to be scrambling for supplies in the middle of a downpour. Your kit should include a sturdy tarp, roofing nails, a hammer, and self-adhesive flashing or repair tape. It’s also smart to have roofing sealant or caulk, a utility knife, and scissors on hand. Most importantly, always protect yourself with heavy-duty safety gloves to avoid cuts and a pair of safety goggles to shield your eyes from debris.
Check the Weather Conditions
This might seem obvious, but it’s the most important rule of roof repair: never, ever get on your roof during a storm, when it’s raining, or even if it’s just wet. A slippery roof is incredibly dangerous, and the risk of falling is high. Your safety is far more valuable than a few shingles. Wait until the weather has completely cleared and the roof has had a chance to dry out. If you have an active leak during a storm, focus on managing the water inside your home until it’s safe to go outside.
Know When to Avoid a DIY Repair
A small, temporary patch is one thing, but some situations are best left to the professionals. You should call for help if you see large areas of damage or any signs that your roof’s structure is compromised, like a noticeable sag. The most critical red flag is water leaking near electrical wiring or fixtures—this is an immediate hazard. If you feel unsafe or the problem area is difficult to access, it’s time to call for an emergency roof repair. A quick fix won’t solve a major underlying issue.
Why You Need a Spotter
Never work on your roof alone. Always have a spotter—a friend, family member, or neighbor—on the ground. This person is your lifeline. They can hold the ladder steady to prevent it from slipping, hand you tools so you don’t have to make extra trips up and down, and keep an eye on you while you work. Most importantly, if you were to slip or get hurt, your spotter is there to call for help immediately. It’s a simple precaution that adds a huge layer of safety to the task.
Find and Assess the Leak
Once you’ve confirmed it’s safe to investigate, your next step is to play detective. Finding the source of a roof leak can be tricky because water doesn’t always travel in a straight line. The spot where you see a drip on your ceiling might be several feet away from the actual problem area on your roof. Water can run along rafters and inside walls before it finally makes an appearance. A thorough inspection, both inside and out, is the key to pinpointing the entry point and understanding the extent of the damage. This initial assessment will help you decide if a temporary fix is possible or if it’s time to call in the professionals for an emergency roof repair. Taking the time to properly assess the situation now will save you headaches later, ensuring you address the root cause and not just the symptom. It also gives you valuable information to share with a professional, which can speed up the repair process significantly when they arrive. Remember, a small stain could indicate a much larger issue hidden from view, so a careful look is your best first move.
Inspect Your Home’s Interior
Start your search from inside your home, as it’s the safest place to begin. Head up to your attic with a flashlight and look for signs of water intrusion. You might see dark stains on the wood, damp insulation, or even a noticeable drip. Remember, water travels, so the place where you see damage inside might not be directly below the leak’s origin on the roof. Trace the water stains or drips uphill along the roof sheathing to find the likely entry point. If you don’t have an attic, check the ceilings in your top-floor rooms for discoloration, peeling paint, or bubbling drywall. These are all tell-tale signs that water is getting in somewhere.
Tips for an Exterior Inspection
If you feel confident and the weather is clear, you can perform a visual inspection from the ground with binoculars or from a securely placed ladder. Look for anything that seems out of place, like missing, cracked, or curled shingles. Pay close attention to the flashing—the metal strips around chimneys, vents, and skylights. A surprising number of roof leaks start in these areas because of failed seals or damage. After a storm, it’s also a good idea to look for signs of impact, which is why a professional hail damage inspection can be so valuable in catching problems early.
Check These Common Problem Areas
Certain parts of your roof are more prone to leaks than others. Focus your inspection on these hotspots. Check the rubber boots around vent pipes for cracks or deterioration. Examine the valleys where two roof planes meet, as these areas handle a large volume of water runoff. Clogged gutters are another frequent culprit; when they overflow, water can back up under the edge of your roof. Also, inspect any skylights or vents for cracked seals or gaps. Identifying the issue in one of these common problem areas can help you understand what kind of repair is needed for your residential roofing.
Document the Damage
Before you do anything else, grab your phone and take plenty of pictures. Document everything you find, both inside and out. Take clear photos of the ceiling stains, damp spots in the attic, and any visible damage on the roof itself, like missing shingles or damaged flashing. This evidence is incredibly important if you plan to file an insurance claim. Having detailed photos creates a clear record of the damage and its extent, which will make the entire process much smoother. Good documentation is the first step in getting expert roof claim assistance and ensuring you get the coverage you need for repairs.
Temporary DIY Fixes to Stop the Drip
When you’ve got water dripping into your home, your first instinct is to make it stop—and fast. While a professional repair is the only long-term solution, a few temporary fixes can help you manage the situation and prevent further damage until help arrives. Think of these as first aid for your roof. They’re designed to buy you precious time, especially if a storm is still raging and it’s unsafe for a crew to get to work.
Remember, your safety is the absolute priority. These quick fixes should only be attempted if you can access your roof safely and feel confident in your ability to perform the task without risk. If you’re dealing with a major leak or feel uneasy about getting on the roof, your best move is to manage the water inside and call for emergency roof repair right away. A temporary patch isn’t worth an accident. For minor, accessible leaks, however, these steps can provide a short-term barrier against the elements.
Use a Tarp Effectively
One of the most common and effective temporary solutions is a heavy-duty waterproof tarp. The key is to use one that is significantly larger than the leaky area. Don’t just cover the spot where you think the leak is; you need to extend the tarp well beyond it. Start by placing the tarp at a point higher than the leak, preferably over the roof’s ridge. This allows gravity to do the work, directing water down and away from the vulnerable spot. Secure the tarp with heavy objects like wood planks wrapped in cloth to prevent them from damaging your shingles. Avoid using nails or staples, as they will only create more holes for water to enter.
Apply Sealants and Roofing Tape
For smaller cracks or holes, waterproof roofing tape or roofing cement can be your best friend. These products are designed to create a quick, watertight seal. Before applying, make sure the area is as clean and dry as possible—this can be tricky in the rain, but do your best. Apply waterproof tape directly over the crack, pressing down firmly to ensure a strong bond. If you’re using roofing cement or caulk, apply a generous layer over and around the problem area with a putty knife. This method is great for sealing gaps around flashing, vents, or chimneys where a small separation has occurred.
Make an Emergency Shingle Repair
Sometimes, the problem is a single damaged or missing shingle. If a shingle is curling up at the edges, you can gently soften it with a heat gun (use extreme caution) and then apply roofing cement underneath to glue it back down. For a completely missing shingle, you can create a temporary patch. Carefully slide a piece of sheet metal or even a new shingle underneath the shingle in the row above the gap. This creates a barrier that directs water over the hole. A dab of roofing cement can help hold it in place, but don’t try to nail it down, as you might damage the surrounding shingles. This is a delicate fix, and a professional residential roofing expert can provide a permanent solution.
Create a Waterproof Barrier
If you’re dealing with a slightly larger area of damage and tape won’t cut it, you can create a more robust temporary barrier with roofing cement and tar paper. After cleaning the area, spread a thick layer of plastic roofing cement over the entire leak using a putty knife. Then, cut a piece of tar paper or heavy-duty plastic sheeting to size and press it firmly into the cement. Make sure the edges are completely sealed. This method provides a more durable patch than tape alone and can hold up a bit longer while you wait for a professional inspection and repair.
Solutions You Should Avoid
In a panic, it’s easy to reach for the wrong solution. First, never try to patch a leak from the inside, like from your attic or ceiling. Water that gets under your shingles will simply travel along the roof deck until it finds another way out, meaning you’ll just be chasing the drip around your house. Also, avoid using materials not designed for roofing, like duct tape, which will quickly fail when exposed to water and UV rays. Finally, resist the urge to drive a bunch of nails into the area. You’re more likely to create additional holes than to solve the problem. The best approach is always a proper hail damage inspection to find the true source of the leak.
Manage Interior Water Damage
Once you’ve applied a temporary fix to your roof, your next priority is managing the water that has already made its way inside. Acting fast can save you from costly secondary damage to your ceilings, walls, floors, and personal belongings. This isn’t just about cleaning up a puddle; it’s about protecting the structural integrity of your home and preventing long-term issues like mold. Taking these immediate steps inside is just as critical as stopping the leak at its source.
Contain the Leak Indoors
Your first move is to limit the spread of water. Place a bucket, trash can, or any large waterproof container directly under the drip to catch the water. If the water is splashing, you can place an old towel or t-shirt at the bottom of the bucket to absorb the impact and reduce the noise. For leaks in the ceiling, you might notice a bulge forming. If it looks like it’s about to burst, you can carefully puncture it with a small screwdriver to release the water in a controlled way, letting it drain into your bucket.
Ventilate the Area to Dry It Out
Moisture is the enemy of your home’s interior. As soon as you’ve contained the drip, get the air moving to start the drying process. Open windows if the weather permits, and use fans or a dehumidifier to dry out wet carpets, drywall, and furniture. Proper ventilation is crucial for preventing moisture from seeping deeper into your home’s structure. The faster you can dry the area, the less chance there is for wood to warp, paint to peel, and insulation to become saturated and ineffective.
Protect Your Belongings
Move any furniture, electronics, rugs, and other valuables away from the affected area. If the leak is in your attic, you can place a large plastic sheet or even a small kiddie pool under the leak to catch a larger volume of water and protect the ceiling below. Water can travel, so be sure to check the surrounding area for any signs of moisture. When you’re facing a serious leak, you need help fast. Our team is ready to provide emergency roof repair to secure your home and prevent further damage.
Prevent Mold Growth
Even a small amount of water can create the perfect environment for mold and mildew to grow, sometimes in as little as 24 to 48 hours. Ignoring a damp spot can lead to significant air quality issues and structural damage down the line. After you’ve dried the area completely, clean it with a solution appropriate for the surface. If the leak was caused by a storm, it’s a good idea to schedule a hail damage inspection to check for hidden issues that could cause future leaks and mold problems.
When to Call for Professional Help
While a quick DIY patch can be a lifesaver in a pinch, it’s almost always a temporary solution. A professional roofer can find the root cause of the leak and provide a permanent fix, ensuring your home stays protected for the long haul. Knowing when to put down the tools and pick up the phone is key to preventing a small issue from becoming a major, expensive problem.
Signs You Need a Pro
Some roofing problems are simply too big or too dangerous to handle on your own. It’s time to call a professional if you notice any of these red flags:
- Widespread damage: If you see large patches of missing or damaged shingles, a DIY fix won’t be enough.
- Structural issues: A sagging roof deck is a serious warning sign that your roof’s structure is compromised.
- Electrical hazards: If you see water leaking near light fixtures, outlets, or your electrical panel, stay away and call for emergency roof repair immediately. This is a serious fire hazard.
- Multiple leaks: If you’re playing whack-a-mole with leaks in different spots, there’s likely a larger, systemic issue at play.
- You’re not comfortable with heights: Your safety is the top priority. If you don’t feel secure on a ladder or a roof, don’t risk it.
Address Safety and Structural Issues
Temporary fixes can stop the dripping for a bit, but they don’t address the underlying problem. Water can travel, and a small leak might be a symptom of a much bigger issue hidden within your roof’s structure. A professional has the expertise to assess the full extent of the damage, from the shingles down to the decking and joists. They can determine if the leak has caused rot or compromised your roof’s integrity, ensuring the final repair is both safe and lasting. This is especially important for both residential roofing and larger commercial properties.
Prepare for Your Insurance Claim
If the leak was caused by a storm, high winds, or hail, your homeowner’s insurance might cover the repair. To get your claim approved, you’ll need thorough documentation. A professional roofer can provide a detailed inspection report, complete with photos and a clear assessment of the damage, which is exactly what insurance adjusters need to see. They can help you determine the cause of the leak and provide the necessary paperwork. At Sky Light Roofing, we offer roof claim assistance to help you with this process, starting with a comprehensive hail damage inspection if needed.
Choose a Reputable Contractor
Once you’ve decided to call in a professional, the next step is to find a contractor you can trust. Look for a local, licensed, and insured company with a solid track record of positive reviews. A reputable roofer will offer a clear, detailed estimate, explain your options without pressure, and stand behind their work with a solid warranty. They should also be able to discuss things like financing options to make the repair process less stressful. Taking the time to find the right partner ensures your roof gets the quality repair it needs.
Prevent Future Leaks
Once you’ve dealt with a leak, the last thing you want is to go through it all again. The good news is that you can be proactive about protecting your home. Taking a few preventative steps throughout the year can save you from the stress and expense of future water damage. Think of it as simple home care that keeps your roof in top shape and your mind at ease.
Schedule Regular Inspections
One of the most effective ways to prevent leaks is to catch potential problems before they start. We recommend having your roof professionally inspected at least once a year and after any major storm. A trained expert can spot subtle signs of wear and tear—like cracked flashing or loose shingles—that are easy to miss from the ground. This small step allows you to address minor issues before they become major headaches. A routine check-up is a smart investment in your home’s long-term health and can extend the life of your residential roofing system.
Maintain Your Gutters
Your gutters play a crucial role in protecting your roof. Their job is to direct rainwater away from your home’s foundation and roofing structure. When they get clogged with leaves, twigs, and other debris, water can back up and pool along the edges of your roof. This standing water can seep under your shingles, leading to rot, decay, and eventually, leaks. Make it a habit to clean your gutters at least twice a year, especially in the fall. It’s a simple task that goes a long way in preventing water from ending up where it doesn’t belong.
Prepare for Storm Season
Here in Central Florida, we know that storm season is no joke. Heavy rain, strong winds, and hail can all cause significant roof damage. Before the season hits, take some time to prepare. Trim any tree branches hanging over your roof to prevent them from falling and causing damage. It’s also a good idea to have a professional hail damage inspection after a severe storm passes through, even if you don’t see any obvious issues. Being prepared can make all the difference in how well your roof weathers the storm.
Act on Early Warning Signs
Your home often gives you clues that a leak might be on the horizon. Don’t ignore them. Small water stains on the ceiling, curled or cracked shingles, or an unusual amount of shingle granules in your gutters are all early warning signs. Even a seemingly minor issue can lead to bigger problems like mold growth or structural damage if left unaddressed. If you spot something that doesn’t look right, it’s best to act quickly. Prompt action can stop a small problem from turning into a costly emergency roof repair.
Related Articles
- How to Repair a Leak in Your Roof: The DIY Guide
- DIY Shingle Roof Leak Repair: A Step-by-Step Guide
- Cost to Fix a Roof Leak: The 2025 Price Guide
Frequently Asked Questions
My roof is actively leaking during a storm. What should I do right now? Your first priority is safety and damage control inside your home. Place a bucket under the drip to catch the water and move any furniture or electronics out of the way. Never climb on your roof during a storm. Once you’ve managed the immediate situation indoors, your next step is to call a professional for an emergency repair as soon as it’s safe for them to come out.
Is a small ceiling stain really that big of a deal? Yes, it’s a sign you shouldn’t ignore. That small stain is often just the tip of the iceberg. By the time water shows up on your ceiling, it has already soaked through your roofing materials, underlayment, and insulation. Addressing it early can be the difference between a simple repair and a much larger project involving mold remediation and structural fixes.
How can I tell the difference between a problem I can patch myself and one that needs a professional? A temporary DIY patch is meant to be a short-term fix for a very small, easily accessible issue, like a single cracked shingle. You should call a professional if you see widespread damage, if the leak is near anything electrical, or if your roof is sagging. Most importantly, if you feel at all unsafe or unsure about getting on a ladder or your roof, it’s always best to leave it to the experts.
I’ve looked everywhere, but I can’t find where the water is coming from. What’s my next step? This is a very common and frustrating problem. Water can travel along roof decking and rafters, meaning the entry point on your roof could be far from where the drip appears inside. If you’ve done a safe visual check and the source isn’t obvious, it’s time to call a professional. They have the training and tools to trace the path of the water and find the hidden source without causing further damage.
After a big storm, my roof looks fine from the ground. Do I still need to get it checked? It’s a great idea to get it checked. High winds can lift shingles and break their seals without tearing them off completely, and hail can cause small, hard-to-see cracks and dents. This kind of damage might not cause an immediate leak, but it compromises your roof’s integrity and leaves it vulnerable to future storms. A professional inspection can catch these hidden issues before they turn into major problems.