
Here in Central Florida, we know that the weather can turn on a dime. A sunny morning can easily give way to a stormy afternoon, which is why having a secure roof is so important. When it’s time for a replacement, the timeline becomes a top priority. The big question is always, “how long does it take to replace a roof?” The answer depends heavily on the season and daily forecast, as our crew’s safety is paramount. This guide explains how we plan around the weather, what a typical timeline looks like for different materials, and how we manage the process to protect your home every step of the way.
Key Takeaways
- Set Realistic Timeline Expectations: A standard shingle roof often takes 1-3 days, but your project’s final schedule depends on its size, complexity, material choice, and unpredictable factors like weather or hidden damage discovered during tear-off.
- Look Beyond Installation Day: The on-site work is just one piece of the puzzle. Remember to factor in the time needed for behind-the-scenes steps like permitting, material delivery, and the final inspection and cleanup when planning your schedule.
- A Little Prep Goes a Long Way: You can help keep your project on track by preparing your property. Clearing your driveway and yard, protecting landscaping, and planning for pets and family will ensure the crew can work safely and efficiently.
How Long Will My Roof Replacement Take?
One of the first questions every homeowner asks is, “How long will my life be disrupted by this project?” It’s a completely fair question. A roof replacement is a major undertaking, and you need to know what to expect so you can plan accordingly. While the exact timeline can vary, most professional projects follow a predictable schedule. The total time from start to finish depends on a few key factors, including the complexity of your roof, the weather, and the team you hire. Understanding these elements will give you a much clearer picture of your project’s timeline.
A Standard Timeline
For an average-sized home with a straightforward roof, a complete replacement can often be finished in a single day. This is a realistic timeline when the weather cooperates and the crew can work without interruption. If your home is larger or has a more complex design—think steep pitches, multiple gables, or dormers—the project will likely take two to three days. For very large residential or commercial roofing projects, or those that require specialized materials, the work could extend from five days to a few weeks. A professional contractor will always prioritize quality and safety over speed.
Emergency vs. Planned Replacements
A planned roof replacement allows for a streamlined process where materials are ordered and the crew is scheduled well in advance. However, an emergency replacement after a storm follows a different path. The immediate priority is to secure your home and prevent further damage, which often means starting with an emergency roof repair like tarping. Once your home is protected, the full replacement can be scheduled. This initial damage control phase means the total time from the storm hitting to project completion can feel longer, especially when contractors are in high demand.
How Crew Size and Experience Affect the Timeline
The efficiency of the roofing crew has a major impact on your project’s timeline. A larger, more experienced team can work together seamlessly to complete the job much faster than a smaller or less-seasoned crew. For instance, a skilled team of about eight roofers can typically tear off and replace a standard-sized roof in just one day. This is where hiring a reputable company with a dedicated, professional crew really pays off. It ensures your project is completed efficiently and correctly, minimizing the disruption to your family and your home.
What Factors Influence Your Timeline?
While we’d love to give you a single, straightforward answer, the truth is that every roof replacement project is unique. Several key factors can stretch or shorten your timeline, from the specifics of your property to the unpredictable Florida weather. Understanding these variables from the start helps set clear expectations and ensures a smoother process for everyone involved. Think of it less as a fixed deadline and more as a flexible schedule that we’ll manage together. Below are the five biggest factors that will shape your project’s timeline.
Your Roof’s Size and Complexity
It makes sense that a larger roof takes more time to replace, but size is only part of the story. The complexity of your roof’s design plays a huge role. A simple, single-level gable roof on a ranch-style home is much quicker to complete than a multi-level roof with steep pitches, dormers, valleys, and skylights. Each of these architectural features requires precise cutting, fitting, and sealing, which adds to the labor hours. Our team carefully assesses the unique structure of your residential roofing project to create a realistic timeline that accounts for every angle and detail, ensuring a high-quality installation no matter the complexity.
Weather and Seasonal Delays
Here in Central Florida, we know the weather can be unpredictable. An afternoon thunderstorm can pop up without much warning, and for the safety of our crew, we have to pause work during rain or high winds. While summer offers longer daylight hours, it’s also our rainiest season, which can lead to delays. We monitor the forecast closely to plan our workdays effectively, but safety always comes first. Unexpected weather is a primary reason for needing emergency roof repair, and it’s also the most common reason for timeline adjustments during a planned replacement. We’ll always keep you updated if the weather impacts our schedule.
Your Choice of Roofing Material
The type of material you choose for your new roof has a significant impact on the installation timeline. Asphalt shingles are generally the quickest to install because they are lightweight and familiar to most roofing crews. On the other hand, materials like concrete or clay tiles are much heavier and require more time and precision to set correctly. Metal roofing also involves a more detailed installation process with custom cutting and fitting. When we discuss your material options, we’ll also walk you through how each choice affects the overall project schedule, so you can make an informed decision that fits both your aesthetic goals and your timeline.
Local Permitting
Before we can swing a single hammer, we need to secure the proper permits from your local city or county. This process is a non-negotiable step that ensures your new roof meets all local building codes and safety standards. The time it takes to get a permit approved can vary widely depending on the municipality’s current workload. Some permits are issued in a few days, while others might take a few weeks. We handle the entire permitting process for you, but it’s an external factor that we have to build into the project’s initial timeline. We can’t start the tear-off until we have that approved permit in hand.
Discovering Hidden Damage
Sometimes, the biggest surprises are hiding right under the surface. We can’t know the true condition of your roof’s underlying structure—the wood decking—until we’ve removed the old shingles. During this tear-off phase, we might uncover issues like soft or rotted wood from a slow leak, or even termite damage. If we find any structural problems, they must be repaired before the new roof can be installed. Addressing this hidden damage is critical for the longevity and safety of your new roof. This discovery can add time to the project, but it’s a necessary step to ensure a solid foundation for your investment.
Debunking Common Timeline Myths
Let’s clear the air about some of the things you might have heard about roof replacement timelines. It’s easy to get caught up in promises of lightning-fast installations or to worry that your project will drag on forever. The truth is usually somewhere in the middle. A lot of factors—many of which are out of anyone’s control—play a role in how long it takes to give your home a new roof.
Understanding these variables helps you set realistic expectations from the start. It’s not just about how quickly a crew can work; it’s about safety, quality, and doing the job right the first time. We’ll break down some of the most common myths so you can go into your roofing project with a clear and accurate picture of the process. From the one-day replacement promise to what happens after the last shingle is laid, here’s what you really need to know.
Can a Roof Really Be Replaced in One Day?
You’ve probably heard the claim that a roof can be replaced in a single day, and in some cases, it’s true. For an average-sized, straightforward home with a simple roofline, a skilled and efficient crew can often complete the installation within one working day. However, this is the best-case scenario. If your roof is particularly large, steep, or has complex features like multiple dormers and skylights, the job will naturally take longer. Think of the one-day roof as the exception, not the rule. It’s absolutely possible under ideal conditions, but it’s not a promise every project can meet.
Why Weather Is a Major Factor
Here in Central Florida, we know that the weather forecast can change in an instant. Weather is the single biggest variable in any roofing project. Rain, high winds, and even extreme heat can bring work to a halt. For safety and quality reasons, roofers cannot work on wet or dangerously windy surfaces. A sudden afternoon thunderstorm can easily push a one-day job into a second day. That’s why experienced contractors build flexibility into their schedules. While summer often brings more predictable weather, it’s also peak season for roofers and storms, so planning ahead is key, especially if you need emergency roof repair after a storm.
Factoring in Material Delivery
Your roofing project timeline doesn’t start the day the crew shows up. It begins once you’ve signed the contract and selected your materials. Your contractor then needs to order everything, from the shingles and underlayment to the flashing and vents. The availability of these materials can impact your start date. While standard asphalt shingles are usually readily available, custom or specialty materials might have a longer lead time. A good contractor will communicate this with you upfront and schedule the work only after confirming the delivery of all necessary supplies, ensuring there are no delays once the project begins.
What Happens After Installation?
The job isn’t over once the last shingle is in place. The post-installation phase is just as important as the replacement itself. This includes a meticulous cleanup of your property to remove all debris, nails, and old materials. After that, a final inspection is conducted to ensure every detail meets quality standards. This is also when you’ll handle the final payment and, most importantly, receive and organize your warranty paperwork. This final step is crucial for protecting your investment for years to come and is an important part of the process, especially if you’re using roof claim assistance to manage the project.
Installation Times by Roofing Material
While factors like weather and roof size play a role, your choice of material is one of the biggest drivers of your project’s timeline. Different materials require unique installation techniques, tools, and levels of expertise, which all affect how long the crew will be at your home. Here’s a breakdown of what to expect for the most common roofing types.
Asphalt Shingles (1-3 Days)
If speed is a priority, asphalt shingles are your best bet. As one of the most common residential roofing materials, experienced crews can install them quickly and efficiently. Most standard-sized homes can be re-roofed in just one to three days. The process is straightforward because the shingles are lightweight and easy to handle. This quick turnaround minimizes disruption to your daily life, making it a popular choice for busy homeowners. Of course, a larger or more complex roof might push the timeline closer to the three-day mark, but it’s still the fastest option available.
Metal Roofing (2-7 Days)
Metal roofs offer incredible durability, but they require a bit more time and precision to install. A typical metal roof replacement can take anywhere from two to seven days. The wide range depends on the style of metal you choose—large standing-seam panels can be installed faster than smaller metal shingles that mimic traditional materials. The complexity of your roof’s architecture also plays a big part. More valleys, dormers, and angles mean more custom cutting and fitting. While it takes longer than shingles, the result is a long-lasting roof perfect for both homes and commercial properties.
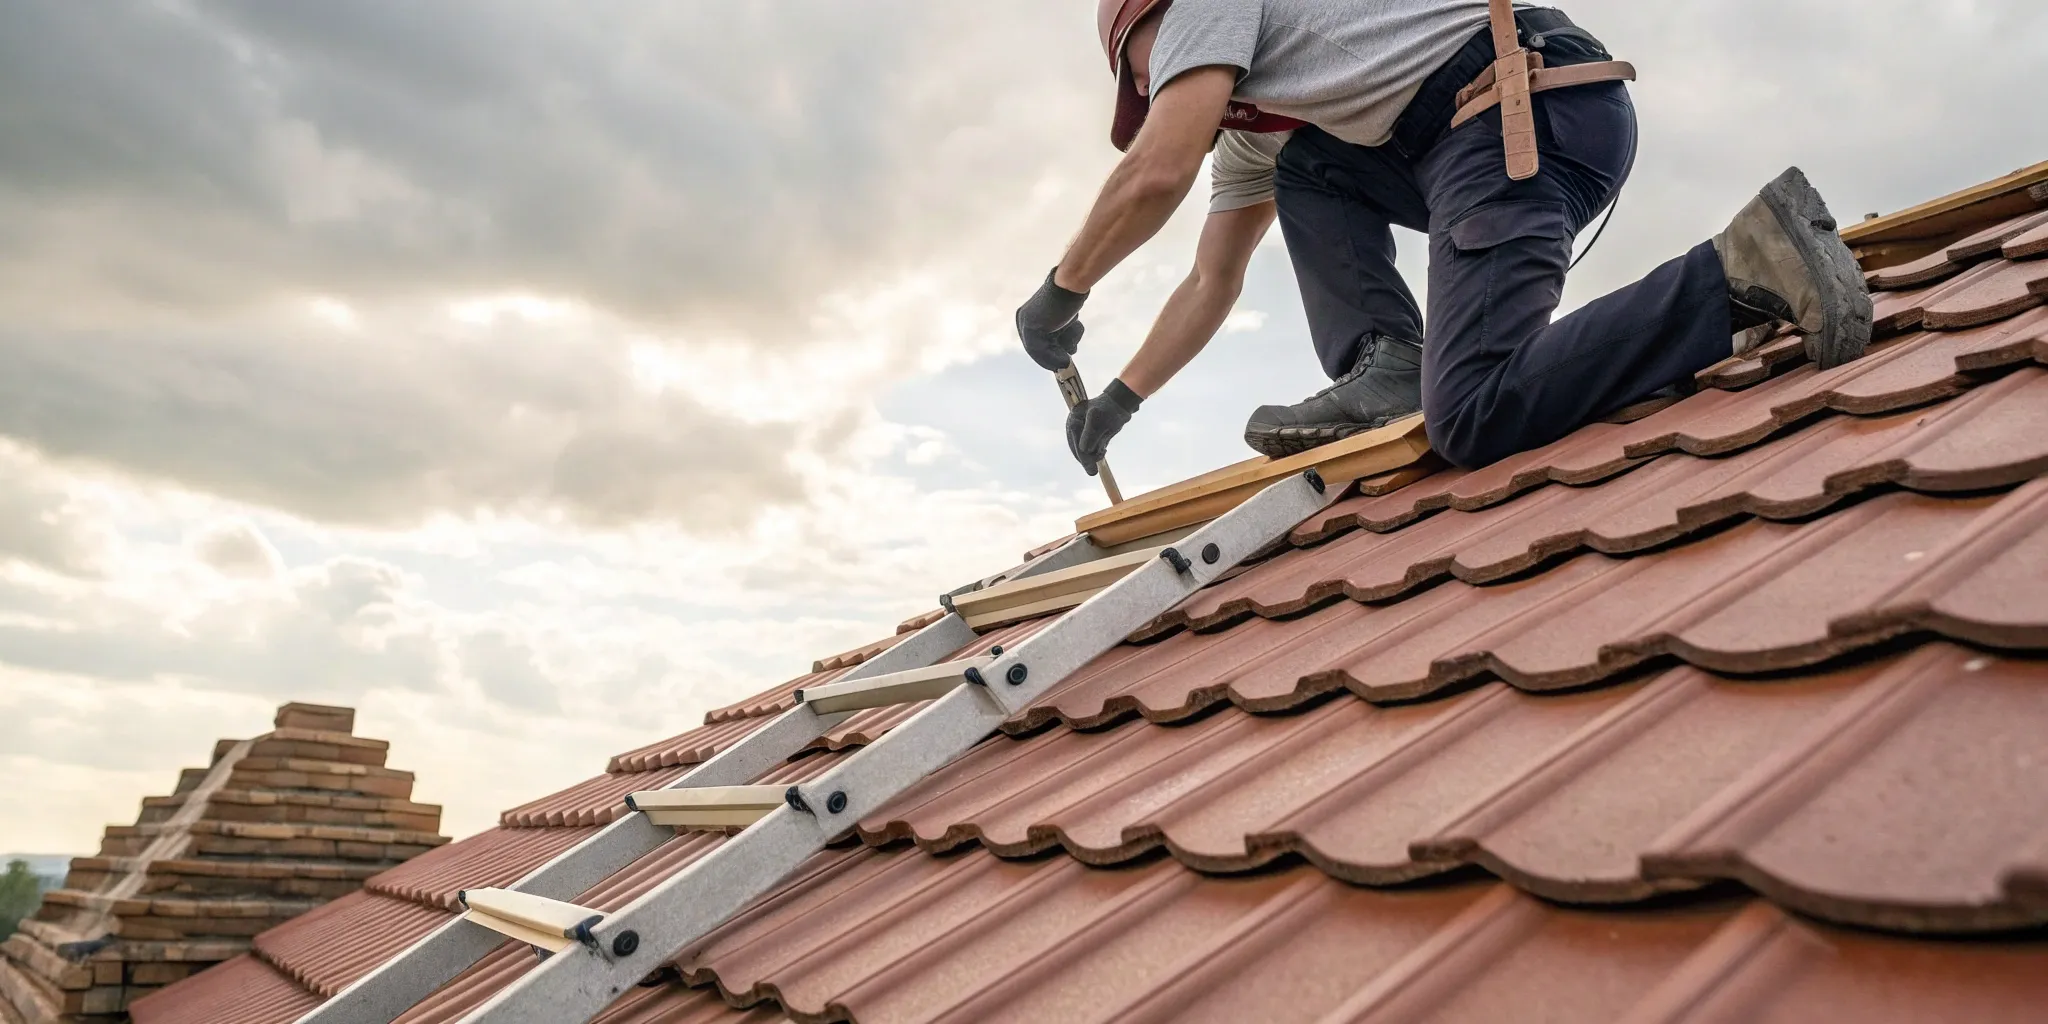
Tile and Slate (6-12 Days)
Tile and slate roofs are stunning and built to last for decades, but their installation is a true craft that can’t be rushed. Expect this process to take between six and twelve days. These materials are significantly heavier than shingles or metal, so your roof’s structure may need reinforcement before installation can even begin. Each tile or piece of slate is installed individually, which is a meticulous, labor-intensive process. The crew’s expertise is critical to ensure every piece is perfectly placed for maximum durability and weather resistance. It’s a longer project, but the payoff is a beautiful, incredibly resilient roof.
Comparing Other Material Timelines
As you can see, your material choice dramatically shapes your replacement schedule. While a simple shingle roof might be done in a day, a complex tile project could take two weeks. The key is to understand that replacing a roof is a multi-step process, and the installation itself is just one part. Before any new material goes on, your old roof needs to be torn off and the underlying structure inspected for any hidden issues. Getting a professional hail damage inspection beforehand can give you a clearer picture of the work needed and help create a more accurate timeline for your specific project.
Your Roof Replacement Timeline: A Step-by-Step Guide
Knowing what to expect can make the roof replacement process feel much more manageable. While every project is unique, most follow a similar four-step path from start to finish. Let’s walk through the typical timeline so you can feel prepared and confident as you get your beautiful new roof.
Step 1: Planning and Prep
Once you’ve chosen your contractor and signed the agreement, the first phase of work begins behind the scenes. We handle ordering all the necessary materials and coordinating their delivery to your home. We also schedule our expert crew for a start date that works for you. Depending on where you live in Central Florida, a permit may be required before we can begin. Our team manages the entire permitting process, ensuring everything is approved so the project can start smoothly and without any last-minute delays. This careful preparation sets the stage for a successful installation.
Step 2: Tear-Off and Inspection
On the first day of the project, our crew will arrive to protect your property and begin the tear-off. This involves carefully removing all the old roofing materials down to the underlying wood deck. This step is critical because it allows us to perform a thorough inspection for any hidden issues, like water damage or rot, that weren’t visible before. If we find anything that needs attention, we’ll discuss the best course of action with you. Addressing these problems is key to ensuring your new residential roofing system has a solid and secure foundation for decades to come.
Step 3: New Roof Installation
With a clean and prepped roof deck, the installation of your new roof begins. This is typically the longest part of the on-site process. Our skilled team will start by installing protective layers like underlayment and flashing before laying your chosen roofing material. The time this takes can vary; a standard asphalt shingle roof is often completed faster than more complex materials like tile or metal. We focus on precise, quality workmanship during this phase to guarantee your new roof is built to last and protect your home effectively against Florida’s weather.
Step 4: Final Touches and Cleanup
After the last shingle is in place, we move on to the finishing touches. Our crew conducts a meticulous cleanup of your property, using magnetic rollers to sweep for any stray nails or debris. Once your yard is spotless, we’ll do a final walk-through with you to ensure you’re completely satisfied with the work. We’ll then finalize the paperwork, including processing the final payment and providing you with all your warranty documents. We can also discuss our convenient financing options to make this final step as easy and stress-free as possible for you.
How to Prepare Your Home for a New Roof
A roof replacement is a major project, but a little preparation can make the entire process run much more smoothly. Taking a few simple steps before the crew arrives helps protect your property, keep your family and pets comfortable, and ensure the team can work efficiently. Think of it as setting the stage for a successful and stress-free installation.
Protect Your Landscaping and Property
Your home is the focus of the project, but the area around it will be a busy work zone. Start by moving any outdoor items away from the house. This includes patio furniture, grills, potted plants, and children’s toys. Store them in a garage, shed, or another part of the yard that’s out of the way. For your garden beds and delicate shrubs close to the house, you can lay down tarps for extra protection from falling debris. It’s also a good idea to take a look inside. The vibrations from the work can sometimes shake things on your walls, so consider taking down any fragile pictures or decorations.
Clear a Path for the Crew
For the roofing team to work safely and efficiently, they need clear access to your property. Before installation day, move any vehicles from your driveway and park them down the street. This gives the crew space for their trucks, equipment, and the dumpster for old materials. Take a walk around your house and trim back any low-hanging tree branches that could get in the way of the roofline. Pruning bushes near the foundation can also help. Clearing a path ensures the team can complete your residential roofing project without any obstacles, which helps keep everything on schedule.
Plan for Your Family and Pets
A roof replacement is noisy. There will be constant hammering, scraping, and footsteps overhead, which can be disruptive and even a little scary for pets. To keep your furry friends safe and calm, it’s best to keep them inside in a quiet room, like a basement or a bathroom with some music playing. If your pet is particularly anxious, you might consider arranging for them to spend the day at a friend’s house or a doggy daycare. The same goes for family members who are sensitive to noise or work from home. Planning an outing for the day can make the experience much more pleasant for everyone.
Give Your Neighbors a Heads-Up
A quick chat with your neighbors is a simple courtesy that can go a long way. Let them know when your roofing project is scheduled to start and how long it’s expected to take. This gives them a heads-up about the noise and the extra vehicles that will be on your street. They’ll appreciate knowing what to expect, and it helps maintain a good relationship. It also gives them a chance to move their cars if they typically park near your property line. A little communication can prevent any surprises and ensures the project causes minimal disruption to the neighborhood.
How to Manage Your Roofing Project
A roof replacement is a significant home improvement project, but it doesn’t have to be a source of stress. With a little preparation and clear communication, you can ensure the process goes smoothly from start to finish. Think of it as a partnership with your roofing team. Staying involved and informed helps keep everyone aligned and ensures the final result is exactly what you envisioned. Here’s how you can effectively manage your project and feel confident every step of the way.
Stay in Touch with Your Contractor
Open and consistent communication is the cornerstone of a successful roofing project. Your contractor should provide a clear timeline upfront, but it’s also important to have a designated point of contact for any questions that arise. Don’t hesitate to ask for daily check-ins or progress updates. A professional team will be happy to keep you in the loop. This is especially critical if you’re navigating an insurance claim, where clear documentation and communication are essential. Having a direct line to your project manager helps you understand any potential delays and makes the entire roof claim assistance process much smoother.
Track the Project’s Progress
While you don’t need to watch over the crew’s shoulder, it’s a good idea to keep an eye on the project’s progress. The installation itself is the most hands-on part of the timeline, and seeing the daily transformation can be exciting. Ask your contractor what to expect each day, from the tear-off of the old roof to the installation of the new materials. This helps you understand the workflow and appreciate the skill involved in your residential roofing project. Regular updates will give you peace of mind that everything is moving along as planned and that the quality of work meets your standards.
Have a Plan for Bad Weather
Here in Central Florida, we know that afternoon storms can pop up without much warning. Weather is the biggest variable in any roofing timeline. For safety and to protect your home, work will pause during rain or high winds. A professional roofing company will always have a plan to secure your home and prevent water damage if bad weather rolls in. While it can be frustrating, remember that these delays are for your protection. It’s always better to wait for safe conditions than to rush the job. If a storm does cause unexpected problems, a reliable team can provide emergency roof repair to secure your property quickly.
Understand the Payment Schedule
Before the first shingle is laid, make sure you have a firm grasp of the financial plan. Your contract should clearly detail the total cost, what it includes (materials, labor, permits, cleanup), and the payment schedule. Typically, you’ll pay a deposit to start, with subsequent payments made at key milestones and the final balance due upon completion. Review this document carefully and ask questions about anything that isn’t clear. If you need help managing the expense, many companies offer convenient financing options to make the investment more manageable for your budget. Knowing the payment plan ahead of time prevents surprises and keeps the project on solid financial footing.
What to Do After Your New Roof Is Installed
The last shingle is on, the crew is packing up, and your home is finally quiet again. Congratulations on your new roof! While the most disruptive part is over, there are a few final steps to take to make sure your investment is protected for years to come. Think of this as the final lap. Taking care of these details now ensures you get the most out of your new roof and have total peace of mind.
After a quality residential roofing installation, your job isn’t quite done. You’ll want to walk through the finished project with your contractor, get all your warranty paperwork in order, and think about a long-term maintenance plan. These steps are especially important if you’ve just navigated a stressful repair or replacement process. Properly closing out the project helps you transition from dealing with a roofing problem to simply enjoying the protection and security your new roof provides. It’s the best way to ensure your home is safe, secure, and ready for whatever Florida weather comes its way.
Conduct a Final Walk-Through
Before you sign that final check, it’s essential to conduct a final walk-through with your contractor. This is your opportunity to inspect the work and make sure everything meets your expectations. Walk around your property and look for any stray nails or debris. Check that your landscaping, siding, and windows are just as you left them. From the ground, look at the new roof itself—the lines should be straight and the surface uniform. Doing this with your project manager present allows you to point out any concerns immediately and ensure all work has been completed to your satisfaction before the team officially wraps up.
Organize Your Warranty Paperwork
Your new roof comes with some very important documents: the warranties. Typically, you’ll receive two—one from the manufacturer for the materials and another from your roofer for the workmanship. Once your roof is installed, make sure to organize and register your warranty paperwork. This step is crucial for protecting your investment. Find a safe place to store these documents, whether it’s a physical file or a digital folder in the cloud. Some warranties require you to register them online to be activated, so don’t put this off. This paperwork is your proof of protection if any issues arise down the road.
Set Up a Maintenance Plan
A new roof is a major investment, and the best way to protect it is with proactive care. After your roof replacement, it’s important to set up a maintenance plan. This doesn’t have to be complicated. It can be as simple as scheduling a professional inspection once a year to check for potential issues. It’s also a good idea to have your roof checked after any major weather event. A quick hail damage inspection after a storm can catch small problems before they turn into costly leaks. Regular maintenance can extend the life of your roof and help you catch any potential issues early on, saving you stress and money.
Related Articles
- Roof Replacement – Skylight Roofing Inc.
- Empower Your Home’s Safety: 5 Essential Steps for Seamless Residential Re-roofing You Need to Know
- Finding a Local Roofing Contractor: Your 9-Step Guide to Quality Roof Repairs – Skylight Roofing Inc.
- 5 Critical Signs You Need Roof Repair in The Villages, FL – Act Now! – Skylight Roofing Inc.
- Expert Advice: What to Ask a Roofing Contractor Before Hiring Them – 9 Crucial Questions for a Successful Roofing Project
Frequently Asked Questions
Is a one-day roof replacement realistic for my home? While it’s definitely possible for a standard-sized home with a simple roofline, it’s more of a best-case scenario than a guarantee. Factors like a steep pitch, multiple levels, or architectural details like dormers and skylights naturally add time to the project. We always prioritize doing the job right over doing it fast, so for most homes, it’s better to plan for a two-to-three-day timeline to ensure a high-quality, lasting installation.
What happens if it rains in the middle of my roof replacement? This is a common concern here in Florida, and we are always prepared for it. If rain starts, our crew’s first priority is to completely secure your home by covering any exposed areas with tarps to ensure no water gets inside. We never work in the rain for safety reasons. Once the weather clears and the roof is safe to work on again, we’ll pick up right where we left off.
What if you find rotten wood or other damage after tearing off the old roof? Discovering hidden damage like soft or rotted decking is actually quite common. If we find any structural issues, we stop work immediately to show you exactly what’s going on. We will explain the necessary repairs, provide a clear cost for the additional work, and wait for your approval before moving forward. While it can add a day to the timeline, fixing these underlying problems is essential for the long-term health of your new roof.
How disruptive is the process, really? Will I need to leave my house? A roof replacement is definitely a noisy and active construction project. You can expect to hear consistent hammering and footsteps overhead throughout the day. Most homeowners find they can stay in the house, but if you work from home or have young children or pets who are sensitive to loud noises, you might be more comfortable planning an outing for the day. The work is contained to the exterior, so your daily life inside can mostly continue as usual.
How long does it take to get started after I sign the contract? The time between signing the contract and the crew arriving at your home is used for crucial prep work. We need to order your specific materials and, most importantly, secure the necessary permits from your local municipality. This process can take anywhere from a few days to a few weeks, depending on material availability and how busy the permit office is. We will keep you informed throughout this phase and give you a firm start date as soon as everything is in place.